Hosting and domain costs until October 2024 have been generously sponsored by dumptruck_ds. Thank you!
Getting Started Mapping
From Quake Wiki
THIS IS VERY MUCH A WORK IN PROGRESS --Scampie (talk) 16:04, 25 March 2013 (UTC)
This article is meant as a basic introduction to how a Quake level is constructed. This tutorial will use the modern Quake editing software Trenchbroom in it's examples, but everything covered will apply to all editors for Quake. The goal is to teach a new level designer what goes into making a map, the terms used, what compiling is, and how to compile and play a created map. If you have ever created levels for the other Quake games, or for the Half-life/Source engine games, all of this will be familiar.
Contents
What's a map!?
A Quake level is created in level editing software specifically designed for the task. There are several editors available, and all of them create .map files. These .map files are used by Quake compilers to generate the final .bsp file levels that can be loaded by the Quake engine. Think of the .map file as a blueprint, and it contains instructions of how to make all the solid geometry of a level, and where all the lights and monsters and pickups should go. There are 2 major objects used to make these instructions: Brushes and Entities.
Brush: Your basic building block!
Our basic building block for constructing a level is the brush. All of our level's solid geometry will be constructed from brushes. But what do we mean by 'brushes'? The semi-technical definition in Quake level creation is that they are convexpolyhedrons. The less technical definition is that they are 3D objects made of faces which cannot 'see' each other. Most commonly, you will use cubes or cuboids, but know that any convex polyhedron is allowed.
It's ok if your head is spinning from reading all that, even if you don't fully understand that definition, using brushes in Quake editing software is easy, and the hard work of mathematically defining them is done for you, hidden away in the background. All you need to do is plop them down, and arrange them to make the walls and floors of your level!
Entities: The life of the party
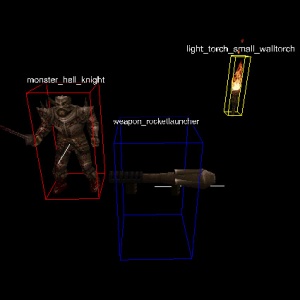
So we have brushes to define our world's geometry... but it wouldn't be a Quake level without weapons and monsters! And entities are just that, they are any of the functional objects defined in the game code for you to place into your level.
There are 2 types of entities: Brush entities and Point entities. Brush entities are things like doors, platforms, and trigger volumes; they are any functional object which need brush geometry tied to them to do their job. Point entities are things like weapons, monsters, and lights; they are all objects which are just simply dropped into place (at a point) in the world.
Entities of both types have various properties that can be edited by the designer to modify specified effects on the entity. Each property is a combination of a 'Key', which is the name of the properties, and it's 'value'. As an example, light entities have a key called 'light', and it's value is set to whatever brightness you want the light to be.
Textures Wads and Compilers
To round out our definitions, let me also talk about some external things we will need along with our .map file to create our final .bsp level.
Each face of a brush is allowed 1 texture, which can be rotated, scaled, and translated. But where do we get our textures? They are stored in .wad files, which are a collection of textures to be used in levels. If you are familiar with older Doom/Doom2 level design, these are NOT the same as their WAD files, despite having the same name.
We also need compilers, which take our raw .map file and turn it into a .bsp file which Quake can load. There are 3 compilers which are used: QBSP, which turns the .map into a .bsp. Light, which calculates all the lighting information in the .bsp using our .map's instructions. And Vis, which calculates visibility in the level to optimize Quake's rendering.
Tools of the trade
Now that we have definitions out of the way, let's get all the tools we will need.
Editing Software: This tutorial will use Trenchbroom. [Homepage]
A texture .wad: We will use Q.wad, which are all the textures from Quake. [Download]
Map compiler tools: This tutorial will use Tyrann's TyrUtils. [Homepage]
Necros's CompilingGUI (optional): This is a handy front end for the compilers so you do not have to use command prompt or batch files to run the compilers. [Homepage]
Trenchbroom you will need to install, the others are loose files which you will need to put somewhere accessible. I personally have a folder on my hard drive E:\q1maps\ where I keep all my .wads, compiling tools, .maps, etc.
Putting it together
Now that we have definitions out of the way, let's open up Trenchbroom and actually build a simple level.
Some setup
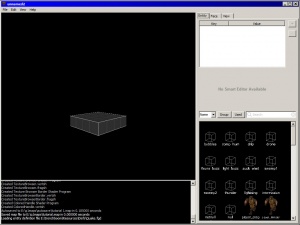
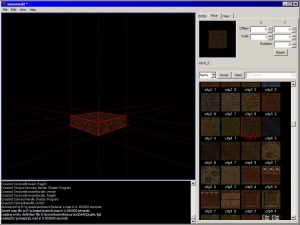
When you first open Trenchbroom, you should have something much like the image on the right, but before we dive into some editing, there's a couple things to set up. First, you likely won't see the little Quakeguy images, or any of the entity models, in the lower right section of your Trenchbroom. To fix this, go to View>Preferences... and set your Quake Path to where your Quake is installed (ex: C:\Quake\). Once you've set this, Trenchbroom will remember it for all future maps you make. Other settings here include OpenGL display settings, and Mouse sensitivity and axis inverting if you wish to modify these.
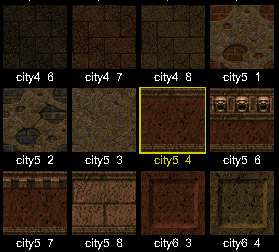
Next, we need to let Trenchbroom know which textures we want to use for this map. Go to Edit>Map Properties... and in this lower half of this dialog, you'll see the empty list of Texture Wads. Click on the + button, and browse to where you saved Q.wad you downloaded earlier. You will be asked how you would like to store the path, leave the default 'Absolute' selected, and click ok. Close out of the Map Properties dialog, and click on the Face tab in the upper right of Trenchbroom. You should now see all the Quake textures loaded in the lower right browser. Every time you create a new map, you will need to follow these steps to choose which texture wad you'd like to use.
Painting the town
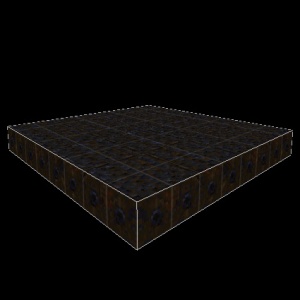
Now we're ready to begin our map. Our brush is currently a sad, untextured grey. Let's fix that by putting a texture on it. Select the brush in the 3D view by Left Clicking on it, it will shade red when selected, and show some 'laser lines' extending from it's bounds. Now, let's put a texture on it. We're going to make this a floor, so find a good floor texture in the browser and Left Click on it to apply it. I'm using city4_2.
In the upper right of Trenchbroom, we can also choose to offset, scale, or rotate this texture on our brush. Textures dimensions Quake must be powers of 2, often 64x64 or 128x128, so you will generally shift them by 1, 2, 4, 8, 16, 32, or 64 units. Scale is a multiplier, so to make textures 'smaller' you will use numbers smaller than 1, such as 0.5 for half-scale. Scale can also be use to mirror a texture, so a scale of -1 will flip it. Rotation is in degrees, 0-360, and negative values are allowed.

